Hello Everybody! I know for many of us, this is a busy time of year. For some it’s getting kids off to a new school year, for others (like me) it’s getting the husband off to a new school year (yep – he’s a teacher).
But still, I’ve been spending some quality time in my studio and this is the latest – a Halloween theme ATB. ATB = Artist Trading Block, at least that’s what they were called when I first started making these fun, smaller decor pieces. Since most people don’t know about the “ATB” thing, I guess I’ll just call them art cubes.

Sizzix die #658983 is what I use to make my ‘blocks’. I’ve used mat board, very heavy watercolor paper and chipboard. My favorite is the chipboard.

Cut two pieces and then start gluing them together with a strong craft glue (Aileen’s). Glue three of the four tabs in place but leave the fourth one unglued for now.

Hold the tabs in place until you’re sure the glue has got a good hold, it should only take a minute or so.

The chipboard makes for a really sturdy little box. The unglued side will actually be my bottom for this piece so I mark a pencil “B” on the outside of it so I always know which side/end is which.

This die makes nice 3″ square cubes to work with. There are smaller and larger ones out there – but I like this size.
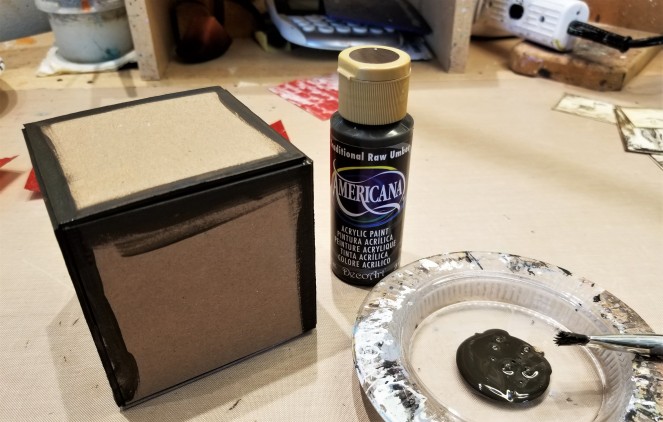
A quick dash of Raw Umber acrylic paint over all the sides and corners. I only do the edges because I’m going to cover the rest with paper.
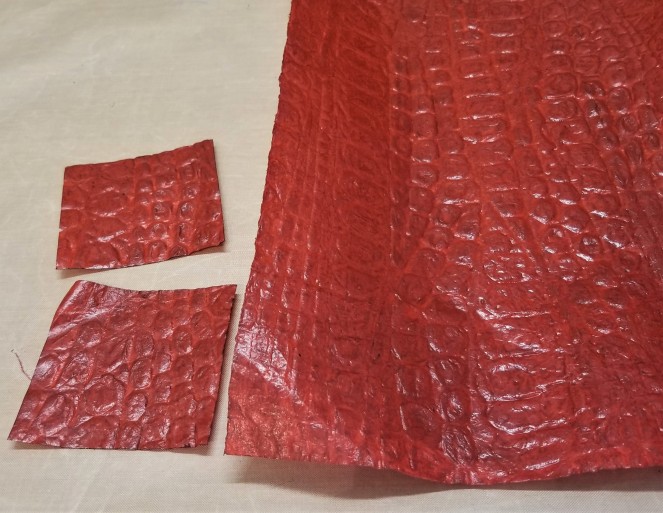
I like working with faux animal embossed papers for my Halloween projects. You can find them in standard sheets, 12″ x 12″ or, in this case – I found huge sheets for an amazingly low price in an online art store (Blick). Now, you may not need two square yards of blood red alligator paper but I can AND I can definitely use the savings on craft supplies.

I cut six 3″ squares, rub a black ink pad along every edge of the papers and then glue them on with the exception of the bottom square. I’ll leave that one off until I know what I’ll do on the bottom. That’s my trusty tub of ModPodge Matte. I buy a big container and pour out a ‘working’ size into the tub this way there’s less chance of my big tub going dry on me from opening it up too many times.

Yep, that’s just what I was looking for.

I cut some toxic green craft paper in 1″ x 3″ panels. Next I took the cling stamp spiderweb and stamped the corners with black Archival ink.

Using a pair of Deckle scissors, I cut the edges all around for a nice added texture.
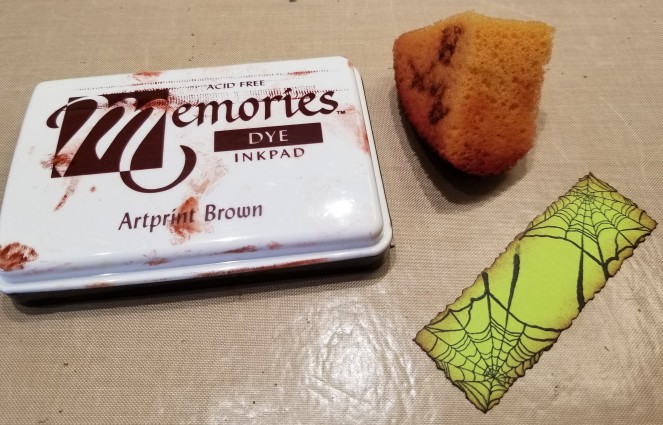
And then I used a craft sponge and Memories Artprint Brown to give the edges a nice aged patina.

I shopped on Etsy in the digital category for some fun clipart featuring bones. I love buying the digital files that I can then download so I can print them as many times as I want.

I ‘edge’ the animal panels with ink, too. Next, I glue on all four green panels and then I glue the animal print on over the green paper.

It’s looking good.

I cut a 3″square of the green paper for the top.

Using the same cling stamp, I hit all four corners.

The Deckle scissors get used again cutting a rough “X” shape. I finish off the edges with the sponge.

Once I have it looking sufficiently grungy – I glue it down to the top section.

I know, me and my plastic skeletons. If you’ve followed very many of my other blogs you’ve no doubt seen me play with these guys before.
One skeleton gets dismembered – eeeewwww.

A little candle flame to touch up the ends of the bones to take away the cut marks and make them look a bit more aged. (Careful, this is light plastic and will melt/burn easily.)

If you want to add a little more color and texture to your bones then drop small amounts of alcohol ink here and there.

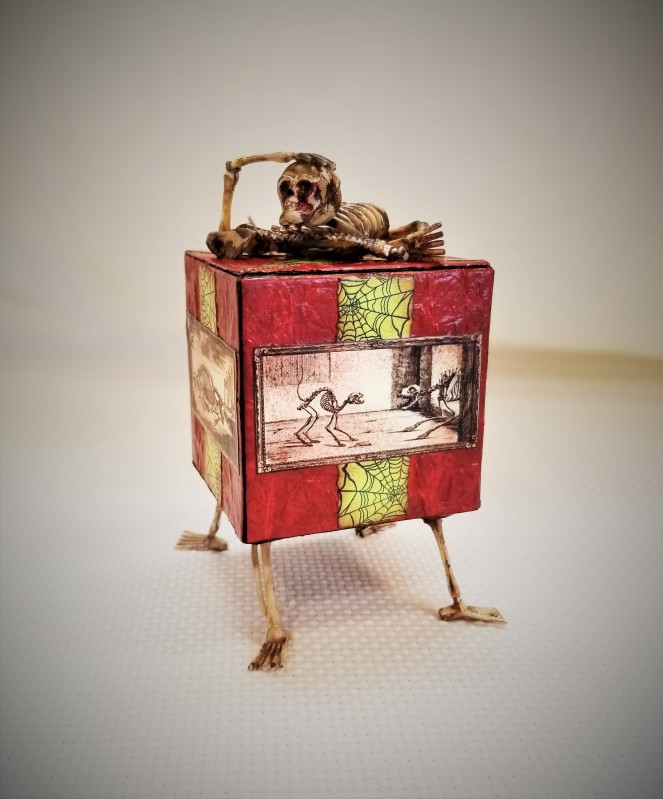
This is sort of a signature creation of mine. I like stacking the bones where the skeleton is holding his head in his hands with the rest of the bones scatter about haphazardly. E6000 works pretty good for this part but it does take a bit longer to dry.

I like to raise my projects up a bit – I think it always looks better, more finished. For the feet on this box I’m going with, well, feet (and shin bones).

I knew that if I tried to just glue the leg bones on with a dot of glue on the end, it would never stand the test of time and usage. So, I put a blob of E6000 on my craft mat, stood the leg bone upside down into the puddle.

And then I used a length of masking tape to hold the leg(s) in place until the glue dried overnight. This way I would have the bone secured in as much glue as possible and a fairly large surface to adhere it to the box by adding fresh glue to the dried sections on the bones. It worked pretty well, actually.

Now that I know I’m not going to need access to the inside of the box for adding any other decorative bits, I’ve gone ahead and glued the last tab in place and added the alligator paper, too.

I did need to trim some of the dried glue puddles away but then I added a fresh coating of E6000, placed them and let them dry overnight.

The next day I used a bit of color-coordinated acrylic paint and covered the shiny, clear E6000. In some respects, this is the most grizzly part of the box – didn’t this come out looking wonderfully gross?

And speaking of details: a final coat of ModPodge Matte will seal in all the little gaps in the paper layers as well as giving the piece a protective layer as these items seem to invite folks to pick them up for a better look.
And that’s it! This item is now listed in my Etsy shop Old Raven.
Here’s the link if you would like to go directly to the listing for more information about the finished project:
https://www.etsy.com/listing/730445701/skeleton-decor-halloween-decor-atb?ref=shop_home_active_1
And now for the final pictures:


Thank you very much for following my blogs. I hope you’ve learned a trick or two along the way.

Smokey says ‘Hi”.
